
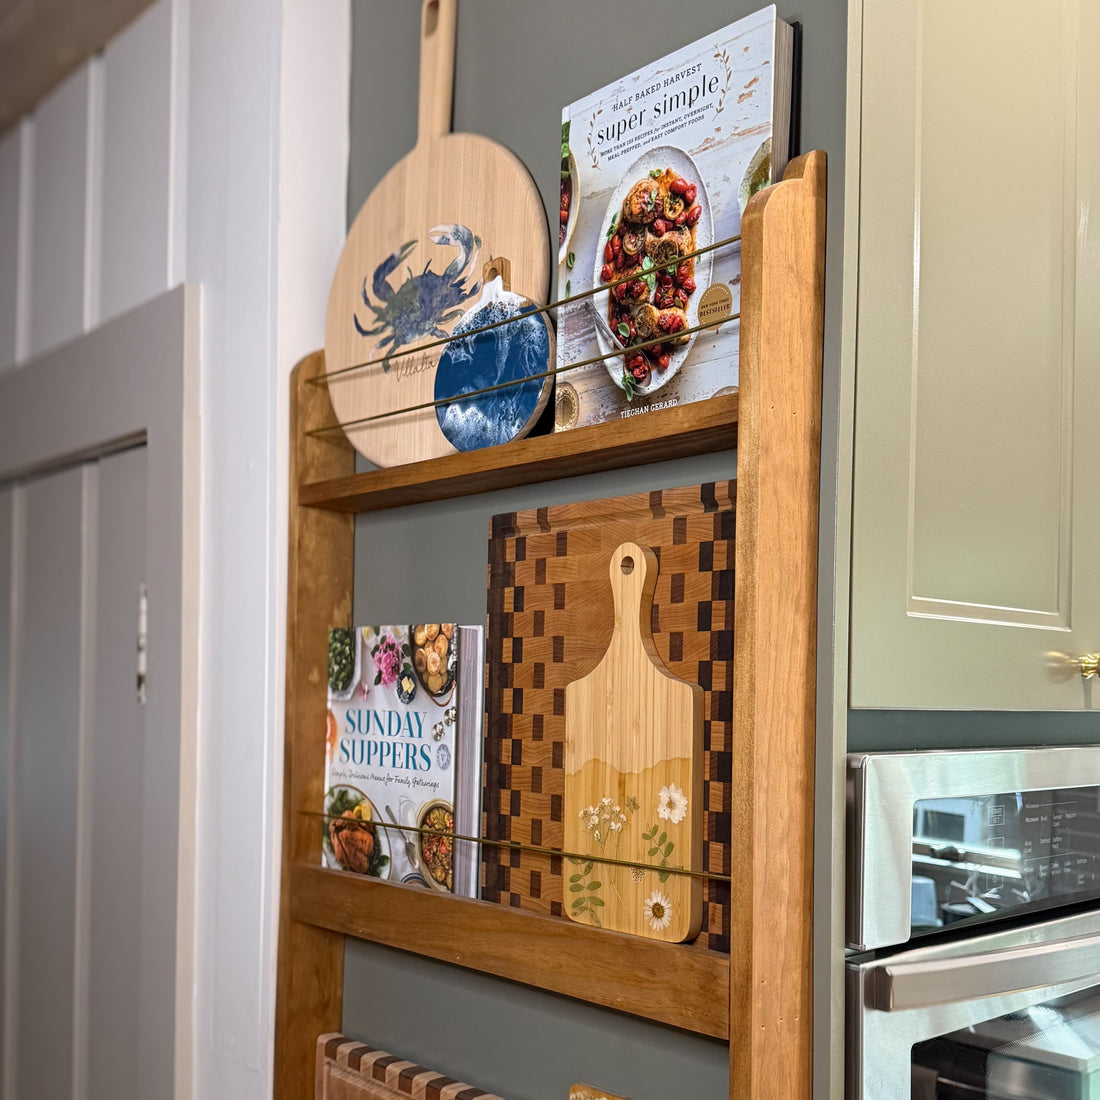
DIY Scalloped Shelf for Cookbooks & Cutting Boards
I’ve had this little spot in my kitchen that just felt… blah. I needed something functional and pretty to store my cookbooks and a few of my favorite cutting boards. So I built this simple, scalloped-edge shelf with pine and brass rods — all for under $40!
It’s the perfect blend of charm and practicality, and it was surprisingly easy to put together. Here’s how I made it, in case you want to try your own!
What I Used:
- (2) 1"x3"x8' pine boards – $14
- (5) 36"x 1/8" brass rods – $25
- Wood glue
- Brad nailer
- Jigsaw
- Sandpaper
- Sander
- Stain (I used Minwax Special Walnut)
- Clamps
- Drill + 1/8" drill bit
- Miter saw
- Table saw
How I Built It

Sketch + Cut the Scalloped Sides
I started by cutting one pine board to 41" long, then freehand sketched a scalloped design on one edge. I used a jigsaw to carefully cut along the line, then sanded it down smooth.
Once I was happy with it, I traced it onto a second 41" board and repeated the cut and sanding process so I had two matching sides.
Tip: If freehanding feels intimidating, you can use a small bowl or cup to trace consistent curves.

Cut and Prep the Shelves
From the remaining pine, I cut four pieces to 21" long:
- Two were left at the full 2.5" width for the top and bottom shelves
- For the middle shelf, one was ripped down to 2" wide and one was ripped down to 1 ¾" wide
This gave the shelf a nice layered look while keeping it lightweight.
Drill Holes for the Brass Rods
To add a little polish and functionality (no tipping cookbooks!), I used 1/8" drill bit to make holes on each side where I wanted the brass rods to sit. I made sure the holes were level across both scalloped sides.
Assemble the Frame
I applied wood glue to the ends of each shelf piece, placed them between the two scalloped side panels, and clamped everything together. Once it was snug and square, I used my brad nailer to secure it in place.
Stain + Add Brass Rods
I used Minwax Special Walnut stain to give it that warm, cozy tone that fits our cottage kitchen perfectly.
Once dry, I cut my brass rods to 21.5" and inserted them into the pre-drilled holes. They add such a beautiful contrast to the wood — functional and fancy!
Mount It & Decorate
To install, I used the brad nailer again to secure the shelf to the wall and into the cabinet beside it for extra support.
Then came the fun part — styling it with cookbooks, cutting boards, and a few favorite touches.

🪴 The Finished Look
This little DIY shelf instantly made the space feel more finished and full of personality. It’s one of those projects that makes me smile every time I walk into the kitchen — and now my cookbooks are no longer shoved in a drawer!

If you try this build (or your own version), I’d love to see it! Tag me @birchandrae so I can cheer you on.